
In case the title wasn’t clear, this blog post is about developing a web application using the Python programming language using Jupyter Lab, Flask, and the Heroku platform. If you were looking for an article on python recipes, you can start off with this one on making a poached Burmese python curry.
The Backstory
The problem with online baking recipes is that the majority of them use volumetric units. As any civilized baker would know, Patricia’s 1 cup of flour may very well be different than Patrick’s 1 cup of flour. Maybe Patricia sifted her flour. Maybe Patrick’s organic flour is a finer texture. Maybe both Pats should measure by mass instead of volume to avoid all this confusion in the first place.
With this in mind, I was tired of constantly typing “1 tbsp baking soda in grams” and “3 1/4 cup flour in grams” into Google every time I came across a new recipe. There had to be a better way, and there was. As usual, Python was staring, patiently waiting for me to make eye contact with it.
My main reqiurement for this application was to be cross-platform. I wanted to be able to carry these conversions out on my laptop, someone else’s desktop, or my smartphone. Although React is what all the cool kids talk about these days, I also wanted to develop something fast. Since Python is both excellent at string parsing and easy to work with, it seemed like an appropriate choice.
After a bit of searching, I came across Flask and Heroku which would allow me to use Python for the entire development process, from prototype to deployment. Super cool.
The Outline
This blog post will outline the development of a simple string-parsing application that converts common ingredients measured in cups, tablespoons, and teaspoons to grams.
- Prototype the recipe conversions in Jupyter Lab’s interactive environment
- Migrate script to Visual Studio Code to a command line interface
- Integrate the Python script with Flask’s web framework
- Set up and deploy the app through the Heroku cloud platform
Interested in trying it out? It’s live at recipe-converter-app.herokuapp.com!
The Development
Prototyping in Jupyter
Sure you can do all your development in a text editor and command line. There’s nothing wrong with putting print statements everywhere, or even having a Python console open to do scratchpad-type testing. But when a tool as flexible and great as Jupyter is available for everyone to use, why settle for anything else?
The reason for Jupyter’s immense success is it excels in a form of programming called “literate programming”. It emphasizes a prose first approach where exposition with human-friendly text is punctuated with code blocks. It excels at demonstration, research, and teaching objectives - Unidata
One of its greatest selling points is the option to execute code in chunks and see what the output is at each step. For data science, pairing this with the ability to write markdown above or below the code block makes documentation and explanations a joy to work with.
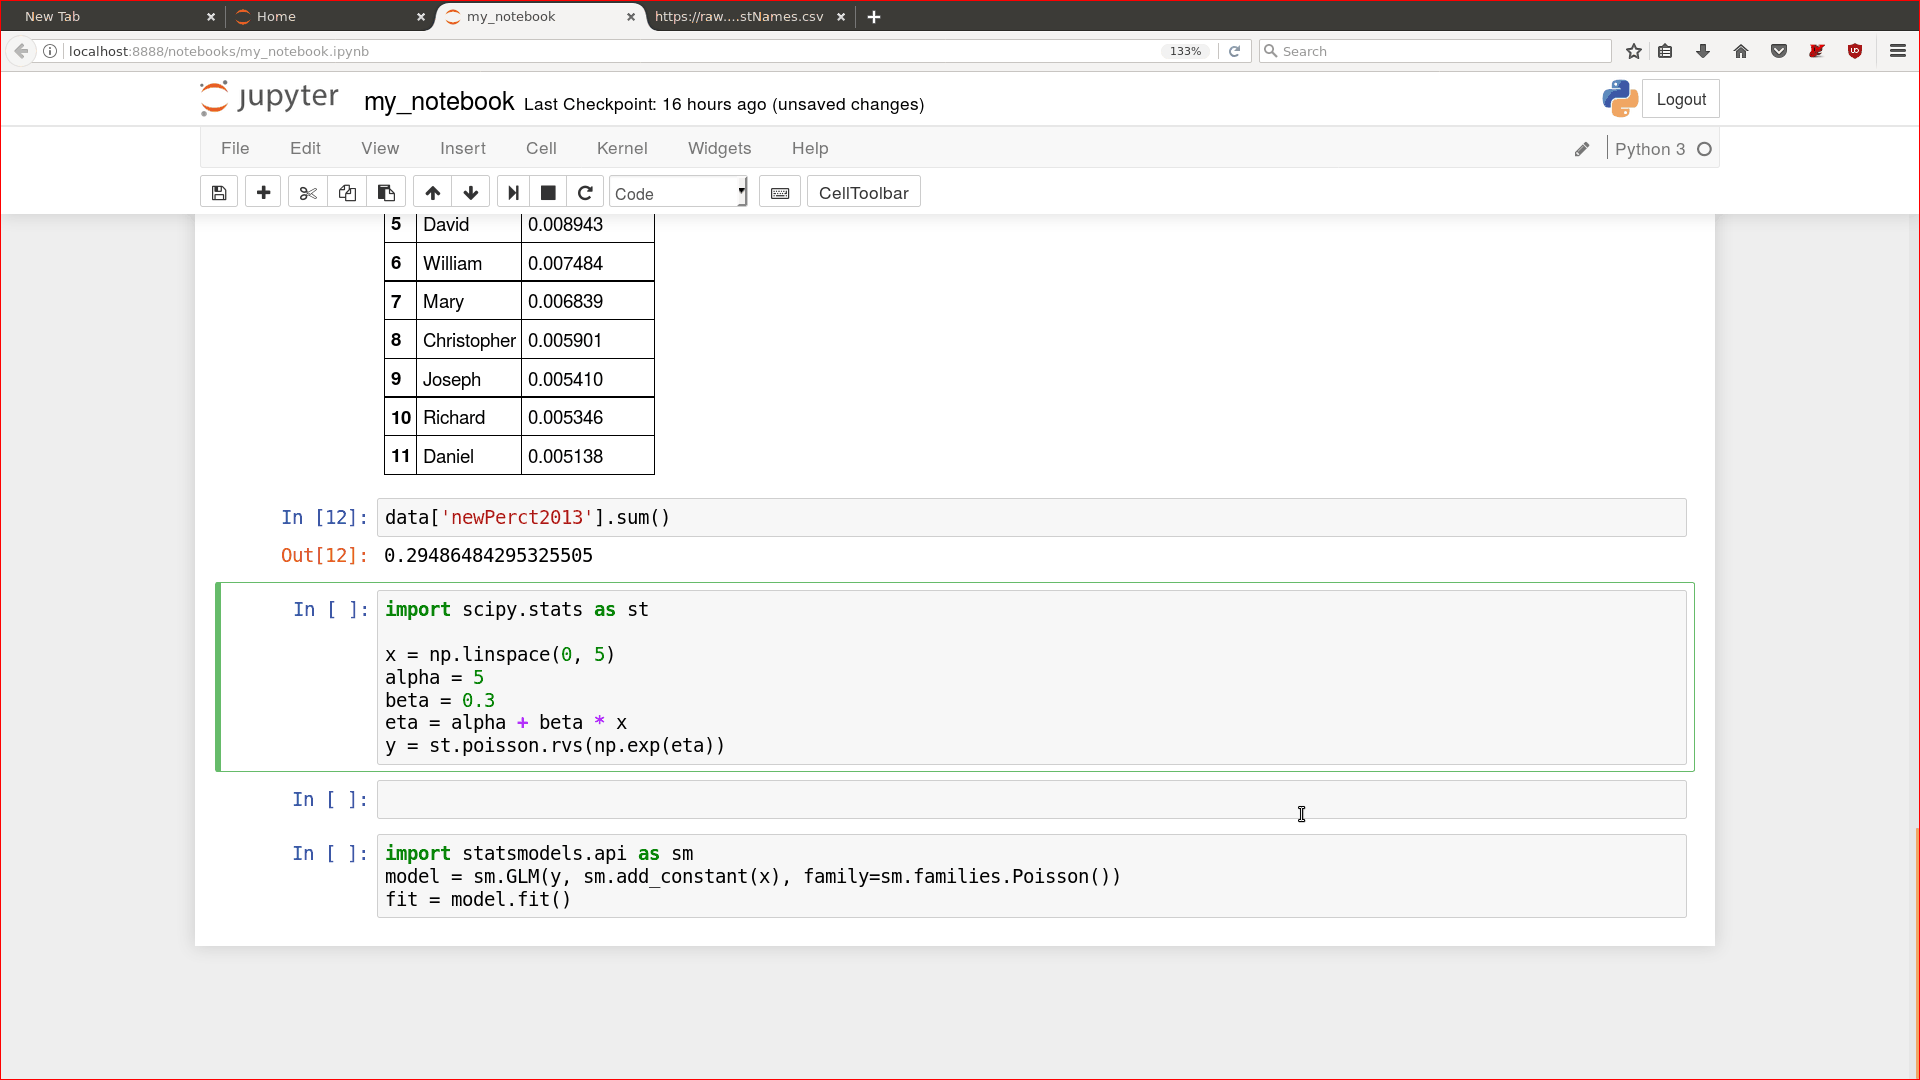
The power of Jupyter's interactive output makes prototyping almost effortless. (Source: Noam Finkelstein)
Jupyter Lab is the successor to Jupyter (previously iPython) Notebook. The tabbed interface is a godsend. (Source: Jupyter)
On To The Prototype
The proposed use case is described below. Nothing complex happening, just a handful of string parsing operations and a conversion table lookup.
- Copy ingredient list to clipboard
- Run script
- Display converted ingredient list
In the run script method (ie. the meat and potatoes of the app):
- Store clipboard text to list data structure*
- Parse fractions to floats
- Unpack abbreviations (ie. tbsp = tablespoon)
- Find each original ingredient in conversion table and convert to grams (where possible)
- Repeat Step 4 for each provided ingredient
*Turns out it’s easy to get clipboard data from a locally running script, but not as straightforward when the script is being hosted on a browser. I guess the user will just have to paste the ingredients into a textbox instead.
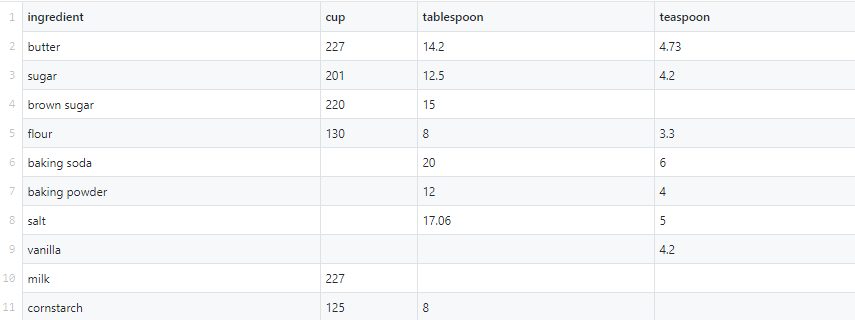
Imperial volume to metric mass (gram) conversions in a csv file, ie. the wrong units to the right ones.
Checking out my first working version, you’ll see that it’s not the most efficient script. However, when proving out a concept, the priority is to get something working (ie. a minimum viable product) and optimize later. Since uncertainty of this working (or being worth it) is quite high, we don’t want to spend too much time making it perfect!

Testing out the prototype in Jupyter.
Comparing that with the current version, we can see that the code structure went from messy and repetitive to organized and modular. Cleaning up code is always mildly therapeutic.

Repetitive version on left, modular version on right.
Now that we’ve finished testing the prototype and are happy with how it works, we can move on to the next step in turning it into a browser-based application.
Migrating to Visual Studio Code
Fortunately, this is painless! In Jupyter, navigate to File > Export Notebook As... > Executable Script, and that’s it. A Python script will download with all the cells in a single executable file.

Exporting from Jupyter Lab to the next phase of development: the command line.

A bit of clean up later and the python script is ready to be imported as a module.
Feel free to check out the cleaned up file on GitHub. That was easy.
Integrating with Flask
Like the Thing Used in Chemistry?
No, this Flask is different! There are many options for web development in Python, with two heavy hitters being Flask and Django. They’re both great frameworks, but where Django is the more fully-featured framework, Flask follows the Unix philosophy of “do one thing and do it well”.
Flask is a lightweight WSGI web application framework. It is designed to make getting started quick and easy, with the ability to scale up to complex applications. It began as a simple wrapper around Werkzeug and Jinja and has become one of the most popular Python web application frameworks.
Flask offers suggestions, but doesn’t enforce any dependencies or project layout. It is up to the developer to choose the tools and libraries they want to use. There are many extensions provided by the community that make adding new functionality easy. - Flask GitHub
For myself (and this app), I chose Flask because of its simplicity and upfront/visible functionality. The function routing, template rendering is called explicitly with functions, with little magic happening “behind the scenes”. As this answer from StackOverflow puts it, “Django can be a little more mysterious for a beginner to figure out how everything fits together”.
Recommended reading:
- Flask Quickstart
- Running Flask from the Command Line
- Flask Simple Web Form Tutorial
- Blogging Application Tutorial
Running With Flask
Now the fun really begins. We can start off by firing up a terminal and installing (and updating) the Flask microframework:
> pip install -U Flask
The simplest example of Flask is shown below (taken from Wikipedia). If you copy it below and execute the script, a blank webpage will render and display “Hello World!” in your browser.
from flask import Flask
app = Flask(__name__)

@app.route("/")
def hello():
    return "Hello World!"

if __name__ == "__main__":
    app.run()
The main difference here is the route() decorator. Modern web frameworks use routing techniques to help keep tracak of application URLs. This decorator is used to bind a Python function to a URL. In this case, the URL is /, otherwise known as the index / home / default page. If we were to change it to /hello, then we’d have to navigate to localhost:5000/hello to see “Hello World!”.

Saying hello from localhost:5000.
Now moving on to our recipe converter, we need two parts to make this work:
- Flask python script for the backend
- HTML template for the frontend
App.py (aka the Back End)
Looking at the code below, there isn’t much difference from the simple “hello world” application from above. One key change is the inclusion of methods = ['GET', 'POST'] in the route() decorator. From the quickstart guide:
GET - The browser tells the server to just get the information stored on that page and send it.
POST - The browser tells the server that it wants to post some new information to that URL and that the server must ensure the data is stored and only stored once. This is how HTML forms usually transmit data to the server.
Since we are going to have a few buttons on our webpage, we need to include these HTTP methods. With multiple buttons, we can do a simple value check to handle them differently.
The second key change is returning render_template() in the routed function call. Since we want to be able to format an HTML page, we can use a template (running on Jinja2) to create one.
We can also pass variables to the template. In this case, textarea is where the user will enter the ingredient list. When the ‘Convert’ button is clicked, the text will be parsed by parse_form_text(). To display the parsed/converted recipe, we can use the flash() method, which Flask provides as a feedback mechanism to the users (see Message Flashing).
from flask import Flask, request, render_template, flash
import recipeConverter as rc

# Stuff to initialize the Flask app
app = Flask(__name__)
app.config.from_object(__name__)
app.config['SECRET_KEY'] = '7d441f27d441f28567d441f2b6176a'   # this can be anything

# This decorator tells Flask to use this function as a webpage handler/renderer
@app.route('/', methods=['GET', 'POST'])
def hello():
    # Default text to display in the HTML template
    input_text = "Hello world!"

    # Normal page load calls 'GET'. 'POST' gets called when one of the buttons is pressed
    if request.method == 'POST':
        # Check which button was pressed
        if request.form['submit'] == 'Convert':
            input_text = request.form.get("text")
            parse_form_text(input_text)

        elif request.form['submit'] == 'Clear':
            input_text = ''

    # Render the HTML template. input_text gets fed into the textarea variable in the template
    return render_template('form.html', textarea=input_text)

def parse_form_text(text):
    # This is where the magic happens
    recipe = rc.RecipeConverter()

    # split the text to get each line in a list
    text2 = text.split('\n')
    text_converted = recipe.parse_recipe(text2)

    for line in text_converted:
        flash(line)

if __name__ == '__main__':
    app.run()
Form.html (aka the Front End)
To accompany our Flask script, we need a usable interface. The interesting bits are encapsulated by {}, and everything else is straight HTML and the Bootstrap library.
The {{textarea}} is the input variable from render_template() above. For the message flashing, we can loop through the message list using get_flashed_messages().
<div class="page-header">
    <h1>Recipe Converter</h1>
    <p class="lead">Tired of reading recipes in cups, tablespoons, and teaspoons when you just want everything in grams? Paste your recipe in volumetric units in the textbox below, and hit "Convert"!</p>
</div>

<!-- Input column (left) -->
<div class="col-md-6">
    <h2>Input Recipe</h2>
    <p>
        <form action="" id="textform" method="post">
            <textarea name="text">{{textarea}}</textarea>         <!-- Input text box -->
            <br>
            <input type="submit" name="submit" value="Clear">     <!-- "Clear" button -->
            <input type="submit" name="submit" value="Convert">   <!-- "Convert" button -->
        </form>
    </p>
</div>

<!-- Output column (right) -->
<div class="col-md-6">
    <h2>Output Recipe</h2>
    <p>
        <!-- Display each converted line from the flash method (from Flask) -->
        {% with messages = get_flashed_messages() %}
            {% if messages %}
                {% for message in messages %}
                    {{ message }}
                    <br>
                {% endfor %}
            {% endif %}
        {% endwith %}
    </p>
</div>
And we’re done! To run the Flask app, we can either execute the Python script by:
> python app.py
Or, as the Flask documentation suggests, we can also use the flask run command after setting the script as the FLASK_APP environment variable.
Unix Bash (Linux, Mac, etc.):
$ export FLASK_APP=app.py
$ flask run
Windows Command Prompt:
> set FLASK_APP=app.py
> flask run
Windows PowerShell:
> $env:FLASK_APP = "app.py"
> flask run

Running Flask in Visual Studio Code.
Deploying on Heroku Cloud
First thing’s first: Create download Heroku and create an account by running (after the installation completes):
> heroku login
Heroku should now be initialized on your local system!
Setting Up the Required Files
To deploy an application/dyno on Heroku, we need the following files:
- app.py
- Flask Python script
- Procfile
- Tells Heroku what commands are run by your application’s dynos
- requirements.txt
- Tells Heroku what modules it needs to install
- runtime.txt
- Tells Heroku which version of Python to use
The following sections will detail what goes into where.
Procfile
We’ll be using Gunicorn to run our application on Heroku, which is its preferred HTTP server. So in Procfile, add the following line:
web: gunicorn app:app --log-file=-
However, Gunicorn is only available on Unix systems. If we want to test our Heroku app locally, we’ll need to specify another command to run the app. For this, we’ll put the following in another file named Procfile.windows:
web: python app.py --log-file=-
This is functionally equivalent to running the Flask command from before, with the main difference is that this uses Heroku’s local hosting framework.
Requirements.txt
In Requirements.txt, we need to add the dependencies our app has. When we deploy it to Heroku cloud, it will install these modules on the server. Add the following lines:
gunicorn
Flask
Runtime.txt
Finally, we need to specify that our app runs on Python in runtime.txt. You can check your own version by running python -V or python --version.
In Runtime.txt:
python-3.6.4
Testing Heroku Locally
For a minimal application, our file structure should look like the following:
  ├── app.py
  ├── Procfile
  ├── requirements.txt
  └── runtime.txt
With our recipe converter app (and because we’re on Windows), we have the addition of two files shown below:
  ├── app.py
  ├── recipe-converter.py
  ├── Procfile
  ├── Procfile.Windows
  ├── requirements.txt
  └── runtime.txt
If you’re on a Unix system, you only need to run heroku local web to start a local server. However, since gunicorn is a webserver that isn’t available on Windows (but is required for Heroku), we need to have a separate Procfile for testing on Windows. Thus, we need to add -f procfile.windows to ensure Heroku uses the correct file. So to start Heroku locally on Windows, we can run:
> heroku local web -f procfile.windows
With any luck, the app should compile and run just like it did with Flask!
Pushing to Heroku App
Heroku uses git to receive files to host on herokuapp.com. First, we’ll setup the Heroku application with heroku create (where the second argument is the app name, otherwise a randomly generated one will be used).
> heroku create recipe-converter-app
The following commands will create a local git repository and queue all files to be pushed to Heroku’s servers.
> git init
> git add .
> git commit -m 'First commit'
Finally, we can push and deploy the files to Heroku:
> git push heroku master

Heroku output on compile.
Troubleshooting: If it compiles but fails to load at *.herokuapp.com, you can check the logs with the following command:
> heroku logs
Published to the Cloud!
After all that’s been said and done, the recipe converter app is now published on herokuapp.com! It’s a freemium service, so it’s worth checking out for professional development as well.

The final python app published through Heroku App.
Logging in to dashboard.heroku.com provides a nice dashboard for managing all your deployments, activity, and more.
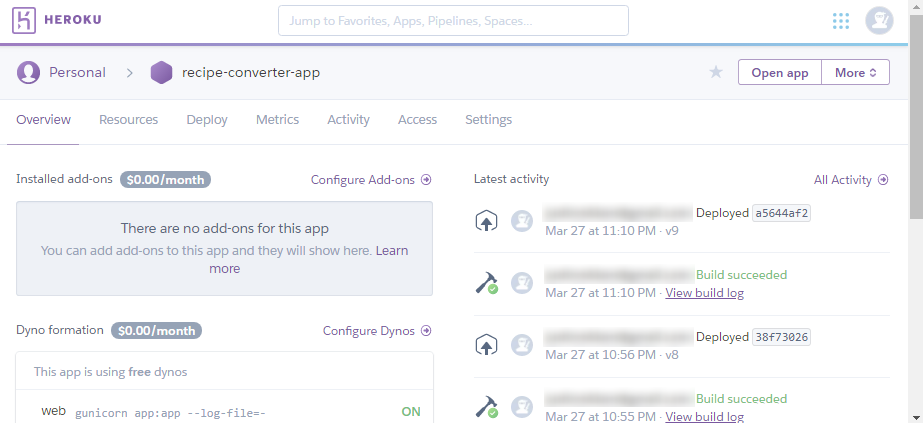
Heroku dashboard to manage your dynos.
Closing Thoughts
To recap our on our journey, we:
- Prototyped the recipe conversions in Jupyter Lab’s interactive environment
- Migrated script to Visual Studio Code to a command line interface
- Integrated the Python script with Flask’s web framework
- Deployed the app through the Heroku cloud platform
Doing everything in Python has its caveats, but it still can be an excellent tool for quickly getting results. Although the deployed version is still (arguably) a prototype, the amount of legwork we had to accomplish to achieve this end product was relatively minimal!
As long as we keep in mind that Python is not the solution to everything, we can use it where appropriate and/or when we are aware of its trade-offs.
Thanks for reading, and I hope you’re motivated to either try developing your own app or to stop using volumetric units. If you had to choose one, my vote is on the latter.
Happy cooking!